

| Flip-Out Galaxy |
Wicked Wall Jumps
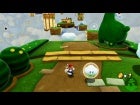
Note: To Unlock this Galaxy you'll need to pick up the hungry Luma at the dead end in World S. Feed it 2,000 star bits (stock up in the Boulder Bowl galaxy if you need to!) to unlock the Flip-Out Galaxy. This galaxy will indeed make you "flip-out." This one takes precision wall-jumping, spins and mad Mario skills. Each time you spin, the red and blue platforms will switch positions. You must carefully use spins to create platforms beneath your feet and walls to rebound off of.


Practice your spin and wall-jump skills by using them to reach the top of the initial platforms. Up here you can find a 1-Up. We cannot adequately explain the acrobatics needed to make your way through this level but we'll try! Be sure to check out the video for a full walkthrough. Enter the warp pipe to continue.


Climb the blue steps and then spin to switch things up. Spin again and quickly wall-jump upwards as the ground gives way. Make your way to the right spinning to create platforms beneath your feet.


Another set of blue walls can be used to climb higher, but you'll have to jump between them and spin to make them pop out around you. Slip past the enemies and hit the midway flag.


Avoid the enemies and spin just as you come to each platform to make it appear beneath your feet. When you come to solid ground, spin to remove the blue platforms ahead. Long-jump towards them and spin to reach the next blue platform just as it pops out.


Patiently wait out the spikes as you make your way to another vertical shaft. This time you'll need to hop towards the wall and rebound off of it, spinning to create a blue wall you can wall-jump upwards with. Hit the final midway flag.


Just past the spiders is the toughest challenge of all. Move out across the spikes and spin to create the blue walls you can use to hover above the spikes. Ignore the Medal above for now -- you'll need to jump back to this later. Make sure you get the 1-Up Mushroom in the first section of blue walls.


From here you can dash to the end of the line or use the second set of blue walls to wait out the spikes. To the far right, alternate spins with wall-jumps to reach the solid ground above. Now it's time to tackle that Comet Medal. From this spot you can long-jump to the far right and reach the top of the blue wall-set/platform you just passed. It's a major jump, and you need to make sure the blue platforms are recessed before you jump so your spin puts some ground beneath your feet when you touch down.


From this blue platform you can long-jump to the left and reach the other blue platform where the Medal is sitting. If you spin you can still reach it, but your path back will be much more difficult. Try to land the jump without spinning and you can long-jump back to the right, skipping the spikes below.


For the final area you'll need to spin and wall-jump between the blue and red sections, but when you wall-jump to the right off the blue section, wait to spin until you fall between the rightmost red walls.


Spin to bring them out when you are between them and you can wall jump upwards. Alternate wall jumps and spins at the top to reach the star.


New Super Mario Bros. Wii Cheats
LEGO Batman 2: DC Super Heroes Cheats
LEGO The Lord of the Rings Cheats
Donkey Kong Country Returns Cheats
LEGO Indiana Jones 2: The Adventure Continues Cheats
LEGO Harry Potter: Years 1-4 Cheats
WWE '12 Cheats
Naruto Shippuden: Clash of Ninja Revolution 3 Cheats
Mario Super Sluggers Cheats
Call of Duty: Black Ops Cheats
NDS
Professor Layton and the Last Specter
X360
Forza Motorsport 4
Wii
Rune Factory: Tides of Destiny
NDS
Harvest Moon: The Tale of Two Towns
PS3
Dark Souls
PC
Dark Souls (Prepare to Die Edition)
X360
Warhammer 40,000: Space Marine
Web
War Commander
PS3
Ultimate Marvel Vs. Capcom 3
X360
Trials Evolution
|
Super Mario Galaxy 2 at IGN
Super Mario Galaxy 2 Cheats at IGN
Super Mario Galaxy 2 Guide at IGN
Super Mario Galaxy 2 at GameSpy
Super Mario Galaxy 2 at GameStats
|

 #1
#1